In this post, I won’t be covering options like syncing your Obsidian vault with cloud providers such as Google Drive or iCloud. While these services are popular, they don’t offer detailed file versioning and often introduce latency. Plus, they generally require an active internet connection, which isn’t always ideal for seamless note taking :(
Git, combined with a hosting service like GitHub, may offer one of the best syncing experiences for Obsidian - second only to Obsidian’s official sync service.
NOTE: This post was written with the assumption that you have basic knowledge of git.
Prepare the git repository
The first step is to initialize git inside your vault folder.
-
Go to your vault folder on your system.
-
Open a terminal in this directory and type the following command to set up git in your vault:
1git initThis command creates a new git repository in your vault folder. Don’t git add your notes yet!
Ignoring files
Before you begin tracking all your notes with git, create a .gitignore file in your vault.
Don’t use Obsidian for editing this file, instead just open your favorite text editor and copy this inside:
|
|
These files aren’t ideal to sync, as they change constantly and will lead to frequent merge conflicts.
I’ll cover in this post how to sync graph view (colors, etc.)
After you’re done, enter these commands to track files and commit them!
|
|
GitHub
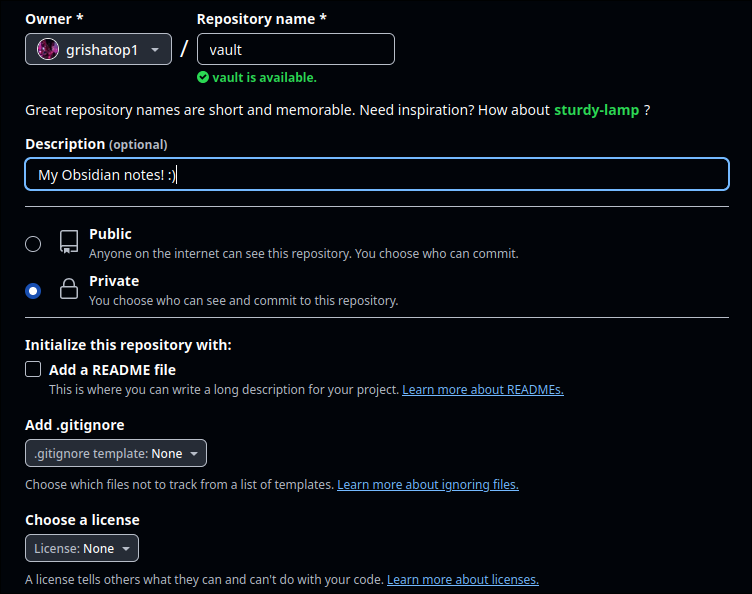
From GitHub’s webpage, create a completely empty repository! Don’t let GitHub add licenses or README file to make the process simpler.
It must look something like this:

Don’t forget to make it private :)
Now back to your terminal, you need to add remotes to git.
You can use these commands:
|
|
I use SSH auth, your git remote add origin may look completely different. There should be a simple guide on your GitHub vault’s remote webpage
Setting up the plugin
- Open your vault in Obsidian and navigate to Settings.
- Go to Community Plugins, search for the git plugin, and install it.
While it’s possible to handle every aspect of syncing directly through the terminal, using the git plugin is simpler. You can push, commit, see changes - all within Obsidian.
To sync everything with the remote repo you just need to open Command Palette and search for Git: commit-and-sync .
From Obsidian Git plugin docs:
Commit-and-sync is the process of staging everything -> committing -> pulling -> pushing. Ideally this is a single action that you do regularly to keep your local and remote repository in sync.
Syncing on mobile
It is still relatively simple to make it work. It requires some additional applications to be installed on your phone.
If you already have Obsidian app I recommend you to remove your vault there or simply reinstall the app.
Obtaining a token from GitHub
Since the git plugin for Obsidian uses isomorphic-git (git client entirely written in JavaScript), which doesn’t support SSH auth yet, we will use personal tokens in the clone process.
- Open GitHub’s webpage, go to Settings -> Developer Settings -> Personal Access Tokens
- Click “Generate a New Token”
- Set a description/name for it, check the “repo” permission.
- Hit “Generate token” button.
- Copy it and save it somewhere before you leave the page because it’s required later!
iOS
-
Install iSH shell from App Store.
-
Open Obsidian and create an empty vault with the same name as your remote repository, in this example it’s
vault. -
In iSH app - enter these commands:
1 2 3 4apk add git mkdir obsidian mount -t ios . obsidian # select obsidian folder in Files cd obsidian -
Now if you go
ls, it should display the vault folder! -
Now remove it :)
1rm -rf vault -
Use this command combined with the token you saved before to clone repo (without angle brackets):
1git clone https://<TOKEN>@github.com/<USERNAME>/<REPOSITORY>.git
Don’t forget to add .git at the end.
That’s it. You can close now iSH and head straight to Obsidian. Use the git plugin for everything else :)
Android
-
Install Termux from desired app store.
-
Open Termux and install git:
1pkg install git -
Grant file access:
1 2pkg install termux-am termux-setup-storage -
Now it depends where you want to store your vault, for this example let’s use Documents folder on your device:
1cd storage/documents -
Use this command combined with the token you saved before to clone repo (without angle brackets):
1git clone https://<TOKEN>@github.com/<USERNAME>/<REPOSITORY>.git
Don’t forget to add .git at the end.
Now you can open Obsidian, select your vault and enjoy! :)
Graph View
The main problem with syncing your graph is that every time you open graph view in Obsidian, it will change the .obsidian/graph.json file, resulting in merge conflicts after pulling from other devices. So we had to put the file into .gitignore
But you probably want to keep syncing “Groups” and “Forces” parameters (which are in .obsidian/graph.json), to have the same fancy looking graph across all of your devices.
And there’s a simple solution! :)
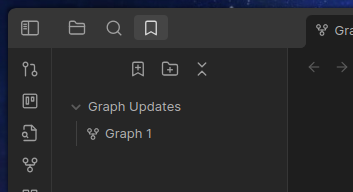
In Obsidian, the core plugin called Bookmarks allows you to take a “snapshot” of your graph and save it as a bookmark file, so you can apply it after on your actual graph view.
The flow
Update or setup the graph colors, forces, filters to your liking
So mine looks something like this:

Create bookmark group “Graph Updates” and bookmark the customized graph

Do Commit-and-Sync command from Command Palette so it syncs the graph bookmark!
On your second device, pull the changes and you will see the mess like this….

This is because Obsidian uses default graph properties since we’re ignoring graph.json.
From the bookmarks tab, select the last graph bookmark you have updated and voila:

It will stay like this even if you close the graph view or Obsidian! Also for every little graph change just make new bookmark and apply it from another device.
Conclusion
Just buy Obsidian Sync it’s like 4 bucks per month…